Follow the steps bellow to create a new Evaluation Template.
There is also a video at the end of this article but it’s recommended to read the steps to have a better understanding, (jump to video).
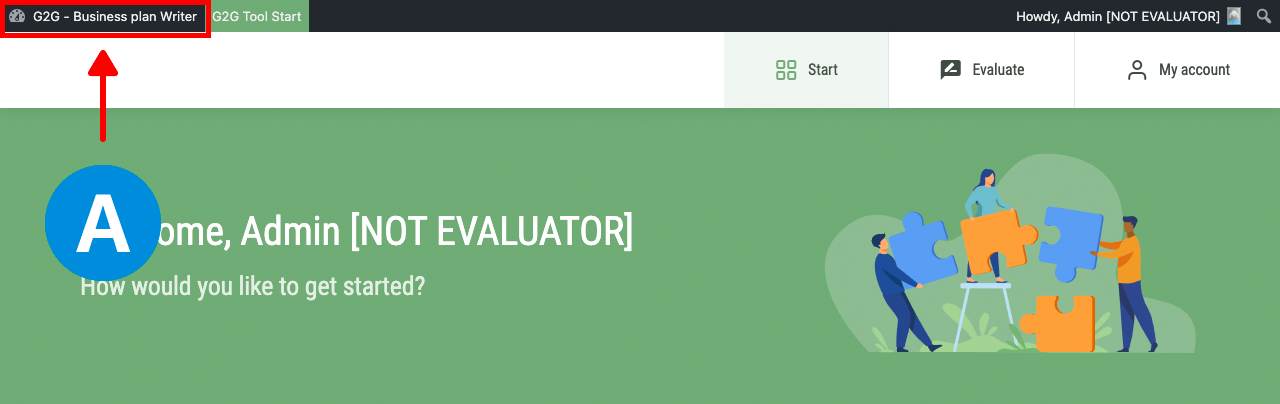
A – In case you are in the tool you will need to click on the left-top area to go in to the Dashboard.
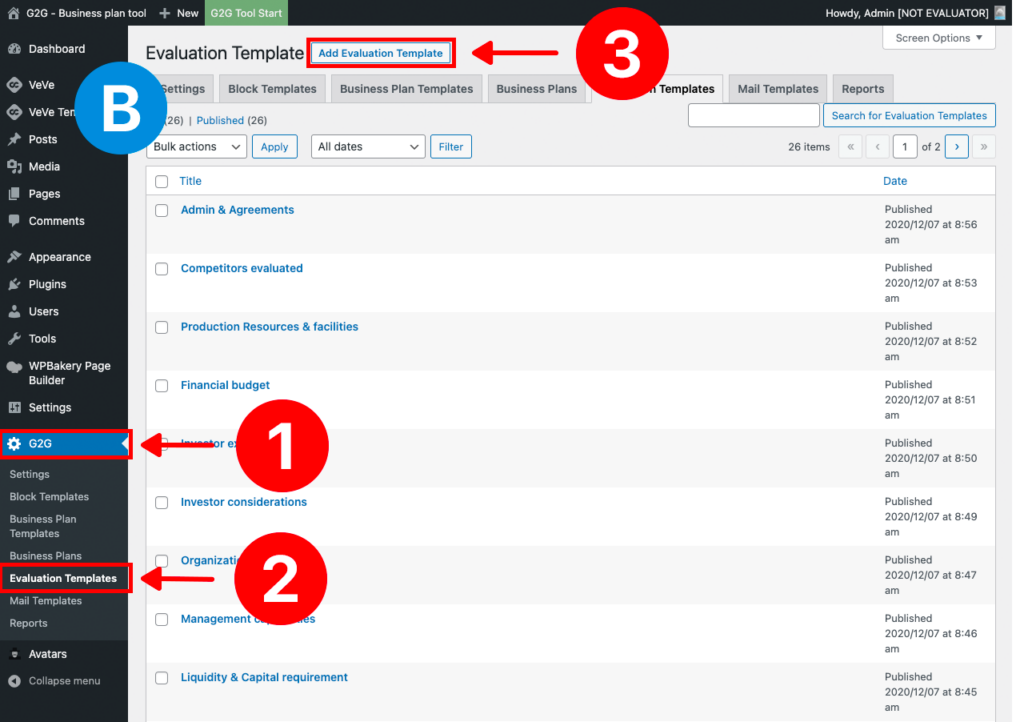
B – You are already in the Dashboard.
1 – Click on the “G2G” blue menu item.
2 – Click on Evaluation Templates menu item.
3 – Click on the button on the top “Add Evaluation Template”.
C – Now we will build the evaluation
1 – Add a title to your evaluation. This should be something relevant with the block that will be connected.
2 – On the left side add your questions. You need to add them one by one. After you add the text for a questions then press the green button “Add Question”.
NOTE: You can rearrange between them by dragging from the small dots icon before each question. Or you can delete them by using the trash can icon after each question.
3 – Add responses. You need to add them one by one. After you add the text for a response then press the green button “Add Response”.
NOTE: You can rearrange between them by dragging from the small dots icon above each response. Or you can delete them by using the trash can icon from the top-right of each response.
4 – When you are all set with the right questions and answers, you need to assign how many points will count each column when the evaluator will select them. We used: 5 – 3 – 1

5 – We set the Evaluation colors. Meaning that based on how many points a block is evaluated it, will result in a color for that block:
- From 1 – 5 = block is Red
- From 6 – 9 = block is Yellow
- from 10 – 15 = block is Green
You will need to set the Limit and the Color like in the next examples and press the green button “Add”:
- Limit: 5, Color: Red (this means that for any value from 1 to 5 the block will be Red)
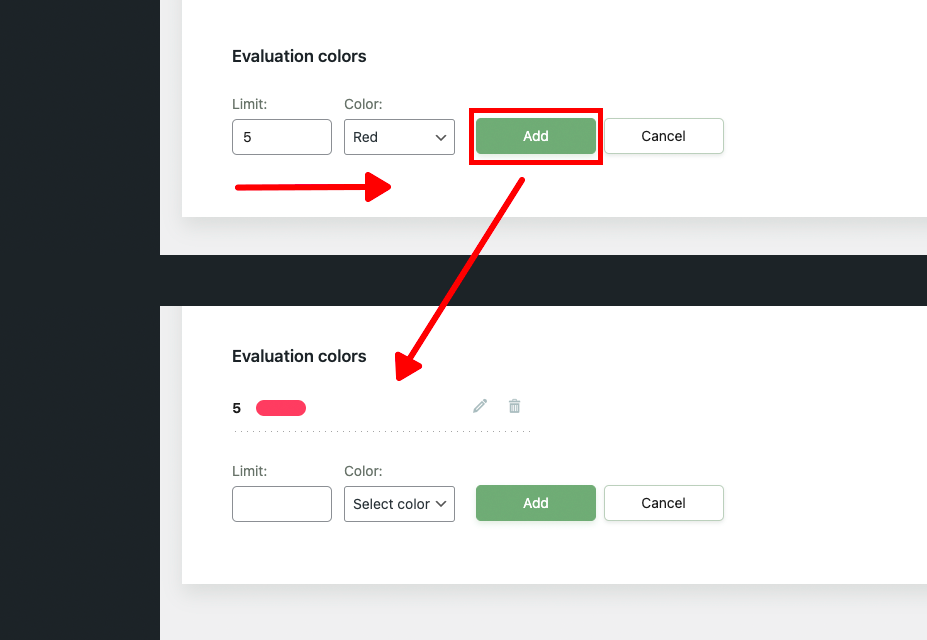
- Limit: 9, Color: Yellow (this means that for any value from 6 to 9 the block will be Yellow)
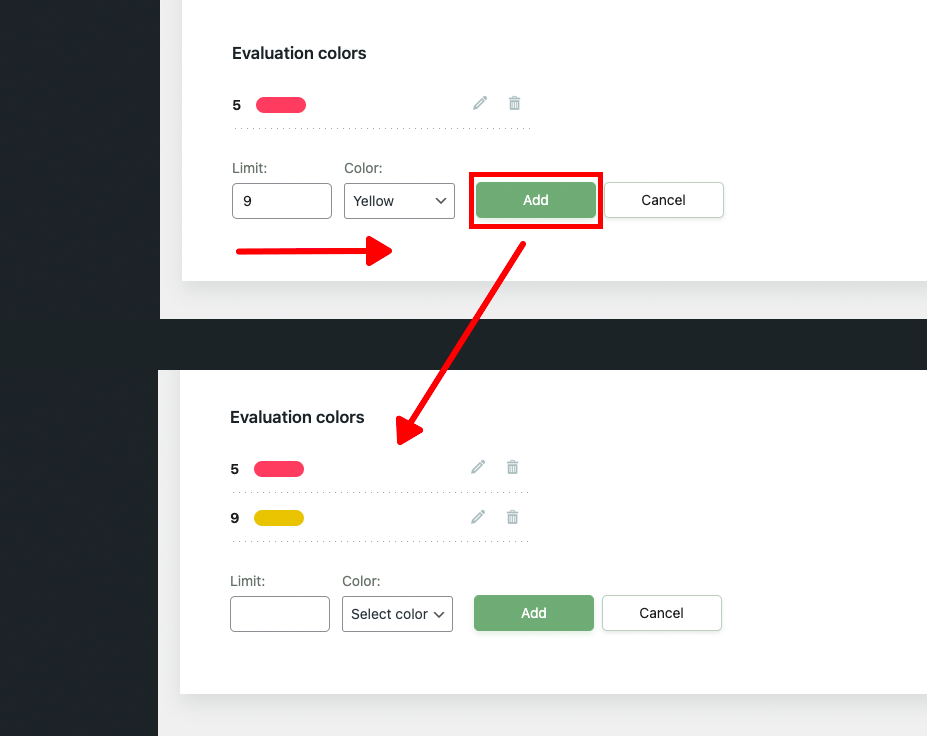
- Limit: 15, Color: Green (this means that for any value from 10 to 15 the block will be Green)
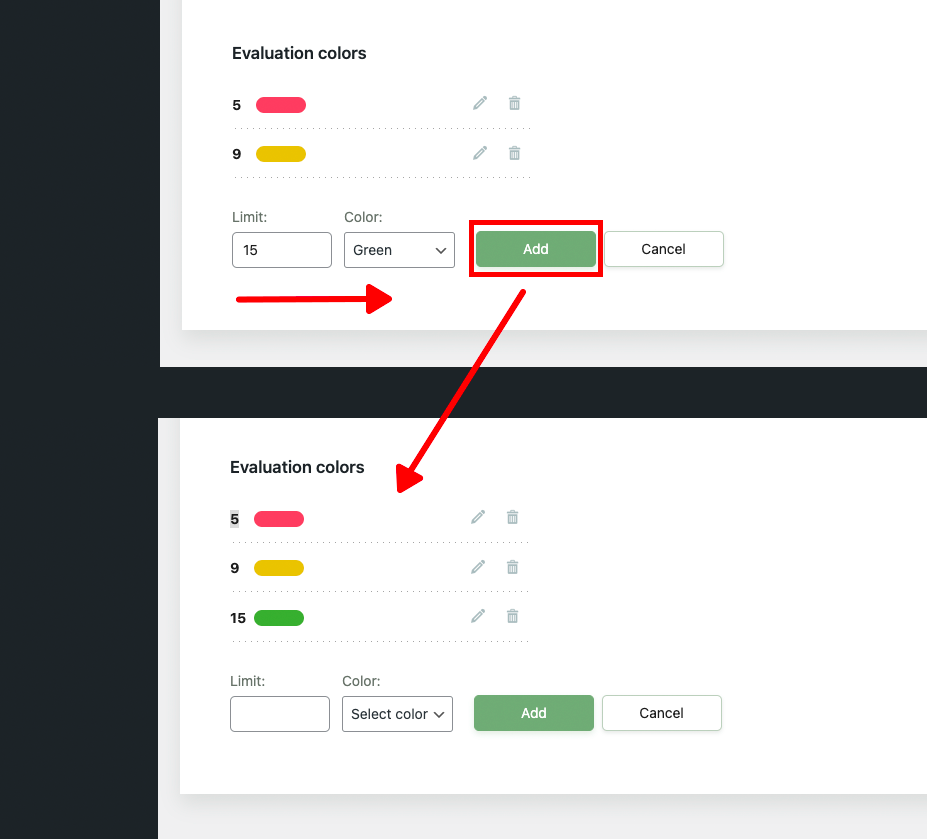
NOTE – you can also delete or edit a value by using the pencil and the trash can icons.
6 – One of the most important step after you are done with all the editing is to publish this evaluation. Don’t forget to press the blue button “Publish“.
After everything is done you need to assign the Evaluation template to a block. See here at point 9.